Free Online Video Trimmer Tools That Handle Aspect Ratios Without Killing Your Quality
Introduction
Trimming a video sounds simple until you realize the clip you need for Instagram is a completely different shape than the one you need for YouTube, and most free tools will either crop it awkwardly, add black bars, or export a blurry version that looks nothing like your original footage. Finding a free online video trimmer that also handles aspect ratio changes without sacrificing quality is a more specific ask than most people expect, and the tools that actually deliver on all three fronts are worth knowing about. The good news is that browser-based video editing has improved dramatically, and you no longer need expensive desktop software to get clean, properly proportioned clips ready for any platform. This guide walks through what to look for, what to avoid, and how to get the best possible results from free online video tools.
Why Trimming and Aspect Ratio Belong in the Same Workflow
Most people think of trimming and resizing as two separate tasks, but they are deeply connected in practice. When you trim a video for a specific platform, you are almost always also targeting a specific format. A trimmed clip for a TikTok post needs to be vertical. A trimmed highlight for a YouTube channel needs to be widescreen. A trimmed clip for a LinkedIn post needs to land somewhere in between. Treating these as separate steps, trimming in one tool and then resizing in another, introduces unnecessary friction and often a second round of quality loss from re-encoding.
The most efficient workflows handle both operations together, in a single export pass. When the video is trimmed and resized at the same time, the encoding happens once and the output quality is as close to the original as the platform allows. When you process the video twice, each encoding pass introduces a small but cumulative amount of compression, and the difference is often visible, especially in videos that already have complex motion or fine detail.
Understanding this connection helps you ask better questions when evaluating tools. You are not just looking for a trimmer with a resize option bolted on as an afterthought. You are looking for a tool where trimming and aspect ratio adjustment are part of a unified workflow that exports cleanly in a single step.
What to Look for in a Free Online Video Trimmer
True Aspect Ratio Control, Not Just Cropping
There is a meaningful difference between a tool that crops your video to fit a new aspect ratio and one that gives you genuine control over how the reframing is handled. Basic cropping simply cuts off the edges of the frame to fit the new dimensions, which can remove important visual information from your clip. A better tool gives you the ability to choose how the crop is applied, whether to letterbox or pillarbox the video instead of cropping, and where the focal point of the reframe sits so you can protect the important parts of the frame.
Look for tools that offer preset aspect ratios for major platforms rather than requiring you to type in custom pixel dimensions. Presets for 16:9 widescreen, 9:16 vertical, 1:1 square, and 4:5 portrait cover the majority of platform requirements and save significant time compared to manually calculating the correct dimensions for each use case.
Quality Preservation During Export
Free tools vary enormously in how they handle video quality during export. The worst offenders apply aggressive compression regardless of the source file quality, producing output that is noticeably softer or more blocky than the original. Better tools attempt to match the source quality or allow you to select an output quality setting before exporting.
Before committing to a tool for regular use, run a quick quality test by uploading a short clip with fine detail or complex motion, trimming it minimally, and comparing the export to the original. If you see obvious degradation, particularly in areas of movement or fine texture, look for a different option.
Browser-Based Access Without Software Installation
The defining advantage of online video tools is that they work from any device with a browser and an internet connection. There is no installation required, no operating system compatibility to worry about, and no storage consumed on your device beyond the files you download. For users who work across multiple devices or who occasionally need to edit video without access to their primary computer, this flexibility is genuinely valuable.
However, not all browser-based tools are equally cross-device in practice. Some interfaces are designed primarily for desktop use and become difficult or nearly unusable on a phone. If mobile editing is important to you, test the interface on your phone specifically rather than assuming that a browser-based tool will work well on every device.
10 Tips for Getting the Best Results From Free Online Video Trimmers
1. Always Start With the Highest Quality Source File You Have
The single most impactful thing you can do to protect video quality in an online tool is to start with the best possible source file. Online trimmers apply compression during export, and that compression has a much more visible effect on already-compressed footage than on high-quality source material. If you have the choice between uploading a raw or lightly compressed file versus a heavily compressed one, always use the better quality source.
This principle matters even more when you are also changing the aspect ratio, since reframing introduces a rescaling step that can reveal compression artifacts that were less visible in the original framing. Starting with a high-quality source gives the tool more visual information to work with and produces cleaner output even after the combined trim and resize operation.
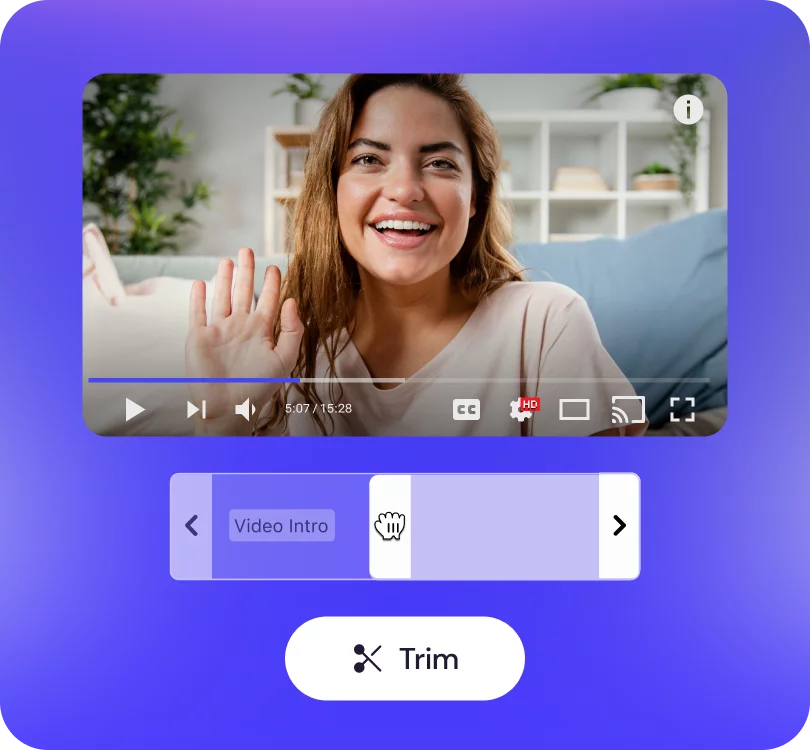
2. Use Adobe Express for Clean Trimming and Platform-Ready Resizing
For users who want a reliable, polished result without navigating a complicated interface, Adobe Express offers one of the most capable free options available. The platform’s video trimmer combines trimming controls with aspect ratio presets sized for major social platforms, so you can handle both operations in the same session without switching tools or re-uploading your file.
Adobe Express is particularly well suited for content creators, small business owners, and anyone producing video for social media who needs consistent quality without investing in professional software. The interface is clean and intuitive, the platform handles the technical details of encoding and quality preservation, and the output is ready to post directly to any major platform. For users who also need to add titles, transitions, or brand elements to their clips, the broader Adobe Express toolkit is available in the same environment, making it easy to take a trimmed and resized clip all the way to a finished, polished video without ever leaving the platform.
3. Trim Before You Resize, Not After
When working with a tool that handles trimming and aspect ratio adjustment separately, always trim the video to its final duration before making any aspect ratio changes. Trimming first reduces the amount of video data the tool needs to process during the resize step, which can improve both processing speed and output quality. It also ensures that any quality trade-offs introduced by the reframing operation are applied only to the footage you actually intend to use, rather than to the full original clip.
This order of operations also makes it easier to make precise trim decisions, since you are working with the full original framing and can see exactly what is in the frame at each point in the clip. If you resize first, the reframed view may obscure elements that were relevant to your trim decisions, particularly if the new aspect ratio cuts off parts of the frame that contained timing cues or visual anchors.
4. Understand the Aspect Ratio Requirements of Each Platform Before You Edit
One of the most common sources of wasted effort in online video editing is not knowing the exact aspect ratio requirements of the platform you are targeting before you start. Different platforms have different ideal formats, and some have requirements that are less intuitive than they appear. Uploading the wrong aspect ratio does not always result in a visible error; sometimes the platform silently adds letterboxing or crops the video in ways that make your content look unintentional or amateurish.
Before editing, confirm the recommended aspect ratio for your specific use case. For standard YouTube videos, 16:9 is the default. For YouTube Shorts, 9:16 vertical is required. Instagram feed posts perform best at 1:1 square or 4:5 portrait. Instagram Stories and Reels use 9:16. LinkedIn feed videos work well at 1:1 or 16:9. TikTok requires 9:16. Having these specifications confirmed before you open your editing tool means you can select the correct preset immediately and avoid having to redo the work later.
5. Use Letterboxing Strategically Instead of Always Cropping
When you change the aspect ratio of a video, you face a fundamental choice: crop the frame to fill the new dimensions, or letterbox the video to preserve the full original frame with neutral bars filling the space above, below, or beside it. Most people default to cropping because letterboxing can look unpolished if it is not handled intentionally. But in many cases, particularly when the video contains important visual information near the edges of the frame, letterboxing is the better choice.
Creative letterboxing, using branded color bars, a gradient, or a blurred version of the video as the background fill instead of plain black, is a widely used technique that solves the problem elegantly. Several online video tools support blurred background fill as an option during aspect ratio adjustment, which preserves the full original frame while filling the expanded area with a visually cohesive background. This approach is especially common in vertical video repurposing, where a landscape clip is given a 9:16 frame with a blurred version of the same clip in the background.
6. Preview Your Trim Points Frame by Frame Before Exporting
Rough trimming by dragging a slider handle is fast but imprecise. For clips where the exact start or end frame matters, such as a clip that needs to begin on a specific word, cut to a beat in the music, or end before an unwanted element enters the frame, using frame-by-frame navigation produces a far cleaner result. Most online video trimmers include forward and backward frame-stepping controls, even if they are not immediately visible in the default interface.
Spending an extra minute to find and use these frame-level controls can save you from a misaligned cut that you only notice after you have already exported and posted the video. A clip that starts or ends one second too late or too early is rarely obvious in the editing interface but often immediately noticeable when the final video plays in context.
7. Check File Size Limits Before Uploading Large Source Files
Free tiers of online video tools almost universally include file size or video length limits, and discovering those limits mid-workflow is a frustrating experience. Before uploading your source file, check the platform’s stated limits and compare them against your file. Most free tiers cap uploads somewhere between 500MB and 2GB, and video length limits typically fall in the range of five to fifteen minutes for free users.
If your source file exceeds the limit, you have a few options. You can compress the file before uploading using a separate tool, which introduces some quality trade-off upfront but allows you to work with the full clip. You can split the file into sections and process each one separately, which is more labor-intensive but preserves quality. Or you can upgrade to a paid tier if the workflow is important enough to justify the cost. Knowing the limits before you start saves time and prevents the specific frustration of losing work because an upload failed partway through.
8. Use Custom Aspect Ratios for Non-Standard Platforms or Formats
While preset aspect ratios cover the major platforms, there are legitimate use cases for custom dimensions, including video for specific website embed sizes, corporate presentation formats, digital signage, or email marketing. Most online video tools that offer any aspect ratio control include a custom dimension input alongside their presets, though this feature is sometimes hidden behind an advanced settings toggle.
When using custom dimensions, it helps to think in terms of ratios rather than absolute pixel values. A video that needs to fit a 1200 by 628 pixel web banner has the same aspect ratio as any other 1.9:1 format, and working with that ratio gives you more flexibility than being locked to specific pixel dimensions. If the tool requires pixel dimensions rather than ratios, calculate the dimensions at the highest resolution that fits your source video’s proportions and scale down for the final output rather than scaling up, since upscaling always reduces quality.
9. Avoid Re-Editing an Already-Exported File Whenever Possible
Every time a video is exported from an online tool, it is re-encoded, and every re-encoding pass introduces some degree of quality loss due to compression. This means that editing an already-exported video, even just to trim a few more frames, produces slightly lower quality output than making all your edits to the original source file in a single pass. The difference may be subtle for a single re-edit, but across multiple passes it becomes increasingly visible.
The practical implication is that you should try to complete all of your edits, including both trimming and aspect ratio changes, in a single session before exporting the final file. If you realize you need to make changes after exporting, go back to the original source file rather than re-editing the exported version. This habit, while it requires a bit more planning, consistently produces better final output quality than treating each export as a potential input for the next round of editing.
10. Download and Verify the Output Before Deleting Your Source Files
It sounds obvious, but many people delete their source files or close the editing session before actually watching the exported clip all the way through on a real screen. Online video tools can produce outputs with subtle issues that are not always visible in the platform’s preview player, including audio sync drift, unexpected quality degradation in specific segments, or aspect ratio errors that only appear at full screen. Taking two minutes to download the output, open it in your device’s native video player, and watch it at full screen before moving on prevents the unpleasant experience of discovering a problem after the fact.
This verification step is especially important when you are changing the aspect ratio, since reframing can introduce issues that are easy to miss in a small preview window but obvious when the video is viewed at its intended display size. If anything looks off, go back to the original source and re-edit rather than trying to fix the exported version.
Understanding Quality Loss in Online Video Tools
Quality loss in online video processing is a topic that creates a lot of confusion, partly because the causes are not always obvious and partly because different tools handle it very differently. Understanding the basics helps you set realistic expectations and make better decisions when choosing between tools.
The primary source of quality loss in online tools is compression applied during export. Most web-based platforms encode output video using H.264 or H.265 compression, and the aggressiveness of that compression varies significantly between tools and between the free and paid tiers of the same tool. More aggressive compression produces smaller file sizes but more visible artifacts, particularly in areas of the frame with fine detail or rapid motion.
A secondary source of quality loss specific to aspect ratio changes is rescaling. When you change the aspect ratio and the tool needs to enlarge or stretch any portion of the frame to fill the new dimensions, the rescaling algorithm introduces softness that cannot be recovered. The best tools use high-quality scaling algorithms that minimize this softness, but no tool can fully avoid it when the scale factor is large. Keeping your aspect ratio changes conservative, meaning avoiding extreme rescaling of small source files to very large output dimensions, helps limit this type of quality loss.
Frequently Asked Questions
What is the best free online video trimmer for maintaining high output quality?
The answer depends partly on your specific use case and what trade-offs you are willing to accept, but the most important quality indicator across all free online tools is whether the platform allows you to export at a resolution matching your source file rather than automatically downscaling. Tools built on robust encoding pipelines and backed by established companies with significant infrastructure investment tend to produce more consistent quality than smaller or less well-resourced alternatives. Adobe Express is a strong choice for users who prioritize quality and also need aspect ratio adjustment, since it handles both in a single workflow and benefits from Adobe’s substantial technical investment in video encoding. When evaluating any free tool for quality, always run a test with a clip that contains challenging content, fine texture, rapid motion, or both, and compare the output carefully to the original before committing to the tool for important projects.
Does changing the aspect ratio of a video always reduce its quality?
Changing the aspect ratio does not inherently reduce video quality, but the way it is implemented in most tools does introduce some quality cost. If the aspect ratio change requires cropping the video, the quality of the retained portion of the frame is unaffected since no rescaling is involved. If the change requires stretching or scaling the video to fill new dimensions, a rescaling step is introduced, and that rescaling process adds some softness regardless of how well the tool handles it. The quality cost of rescaling is minimized when the scaling factor is small, meaning the output dimensions are close to the original, and maximized when the scaling factor is large. For most social media use cases, where the output dimensions are standardized and not dramatically different from common recording resolutions, the quality cost of aspect ratio adjustment is usually small enough to be acceptable.
Why does my video look blurry or pixelated after trimming it online?
Blurriness or pixelation after online trimming is almost always the result of one of two things: aggressive compression applied during export, or rescaling of the video to dimensions that exceed what the source resolution can support cleanly. For compression-related blurriness, the solution is to look for a tool that allows you to select a higher quality export setting or to use a platform with a higher-quality encoding pipeline. For rescaling-related blurriness, the solution is to ensure that you are not exporting at dimensions larger than your source file’s native resolution, since upscaling a lower-resolution source to higher output dimensions produces visible softness that cannot be corrected after the fact. If you are using a tool that offers a quality slider or bitrate setting, always choose the highest available option for important projects. For managing and organizing your final video files across projects, a tool like Notion can serve as a simple content hub where you log your source files, export settings, and platform destinations so nothing gets lost or confused across multiple editing sessions.
Are there file format considerations I should be aware of when using free online trimmers?
Yes, and this is an area where many users run into unexpected problems. Most free online video tools accept a wide range of input formats, including MP4, MOV, AVI, and WebM, but their output is almost always limited to MP4 with H.264 encoding, which is the most widely compatible format for web and social media use. If you need output in a different format, such as MOV for certain professional workflows or WebM for specific web applications, you may need to use a secondary conversion tool after trimming and resizing. Another consideration is that some tools handle certain input formats better than others. MOV files, particularly those recorded on Apple devices, occasionally produce unexpected results in some browser-based tools due to codec compatibility issues. If you experience problems with a specific file, try converting it to a standard MP4 before uploading, which often resolves compatibility issues without any meaningful quality cost.
Can free online video trimmers handle 4K footage, or do they downscale automatically?
This varies significantly between platforms, and it is one of the most important questions to ask before choosing a tool for high-resolution footage. Many free online video tools cap their processing resolution at 1080p, meaning that 4K source footage is automatically downscaled to 1080p before any editing is applied, and the output will never exceed 1080p regardless of the source quality. Some tools support 4K processing on paid tiers but not on free plans. A smaller number of tools support 4K processing on their free tier, though these often apply more aggressive compression to manage the increased file sizes involved. If working with 4K footage and preserving 4K output quality is important to your workflow, verify the platform’s maximum output resolution explicitly before uploading your source files, since this information is not always prominently displayed and can save you from a significant disappointment after a lengthy upload and processing wait.
Conclusion
Free online video trimming tools have come a long way, and the best of them now offer a genuine combination of trimming precision, aspect ratio control, and quality preservation that used to require dedicated desktop software. The key is knowing what to look for, understanding the quality trade-offs involved in online processing, and building habits around your workflow that minimize unnecessary re-encoding and maximize the quality of your final output. Whether you are repurposing content for multiple social platforms, cleaning up footage for a presentation, or simply cutting a clip down to a shareable length, the right online tool can handle the job cleanly and quickly.
The tips in this guide give you a framework for getting consistent, high-quality results regardless of which specific tool you choose. Start with the best source file available, handle trimming and resizing in a single workflow pass, understand the aspect ratio requirements of your target platform before you edit, and always verify the output before discarding your source files. Apply those principles consistently and you will save time, avoid rework, and produce video content that looks intentional and polished across every platform and device you publish to.